
Every fashion designer knows the gap between a sketch on paper and a production-ready visual. Traditionally, bridging that gap required hours of digital rendering, hiring photographers, and booking models. With StyTrix's Concept Creator, you can go from a rough sketch to a photorealistic, model-ready image in under 30 seconds.
In this tutorial, we'll walk through the complete True to Sketch workflow step by step.
What You'll Need
- A StyTrix account (free tier works)
- A fashion sketch image (hand-drawn or digital — black-and-white line art works best)
- A short text prompt describing your design
Want to follow along? Download the sample sketch we'll be using in this tutorial:
Download sample sketch (demo-sketch.png)
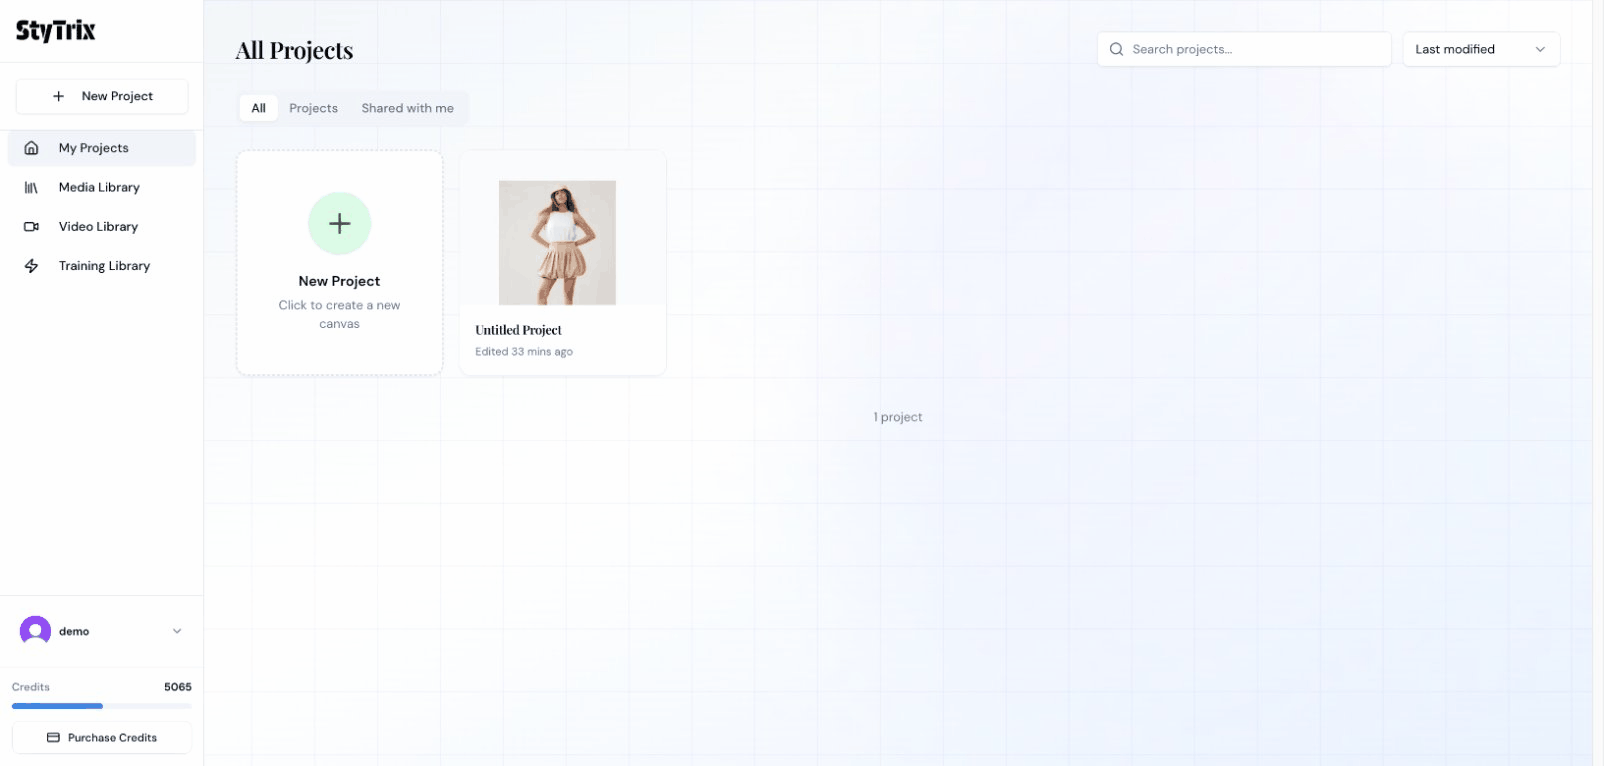
Step 1: Create a New Project
From the Dashboard, click the New Project card to create a fresh canvas. This opens the StyTrix Canvas — your central workspace for all design tools. You'll see a sidebar on the left with all available AI tools, and a blank canvas in the center.
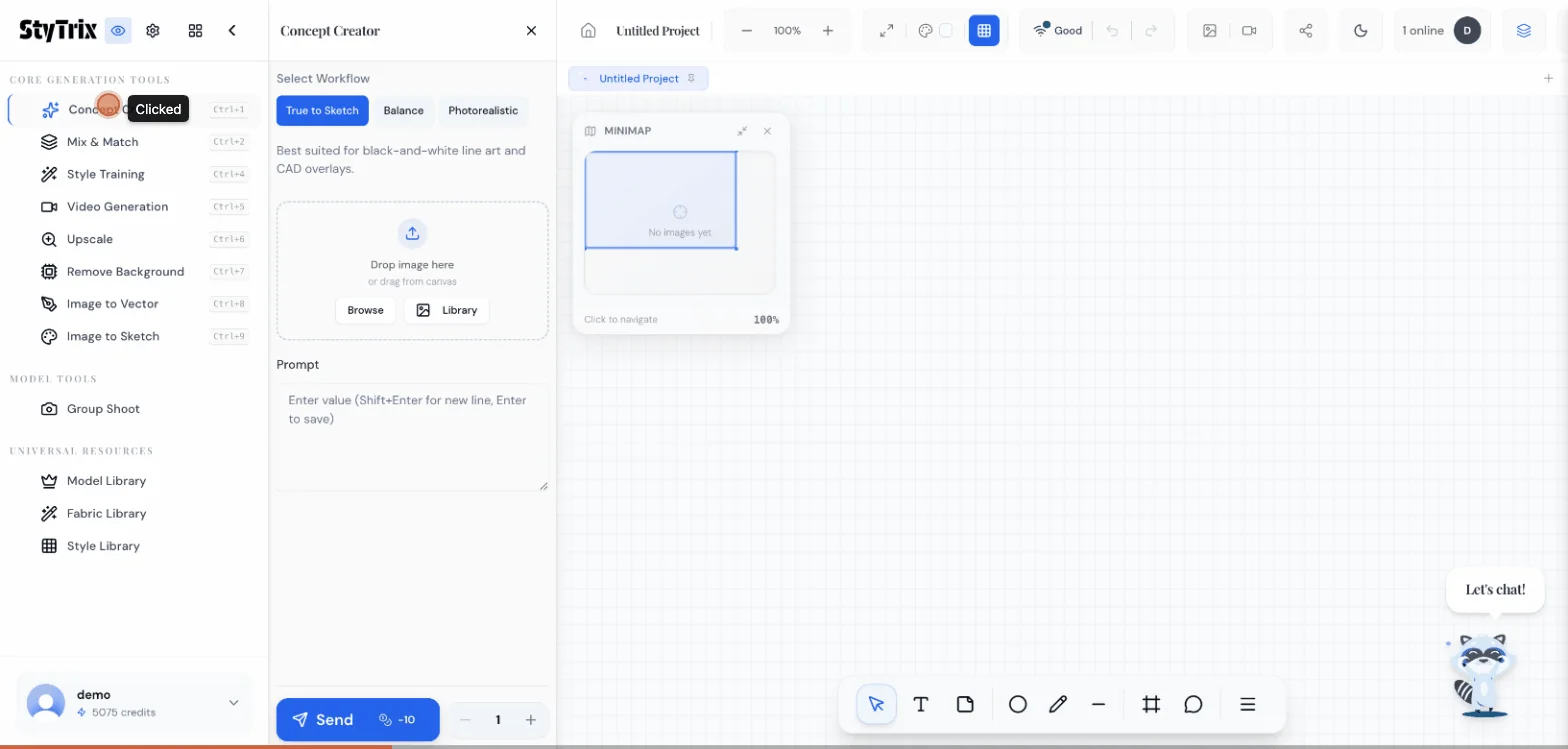
Step 2: Open Concept Creator
In the left sidebar under Core Generation Tools, click Concept Creator. This opens the generation panel with three workflow modes:
- True to Sketch — Best for black-and-white line art and CAD overlays. Stays faithful to your sketch's structure.
- Balance — A middle ground between sketch fidelity and AI creativity.
- Photorealistic — Maximum realism, with more AI interpretation.
For this tutorial, we'll use True to Sketch since we want the output to closely match our original design.
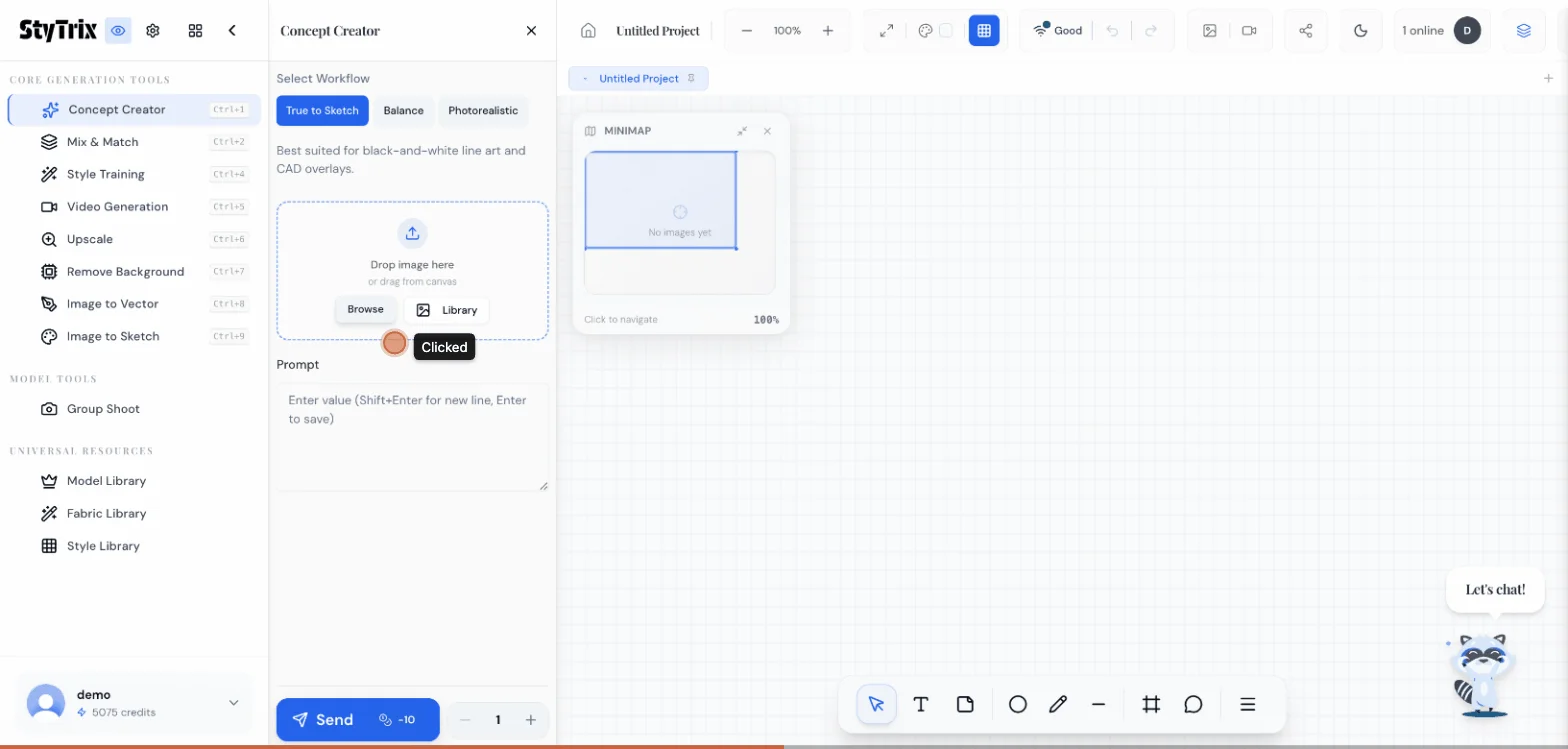
Step 3: Upload Your Sketch
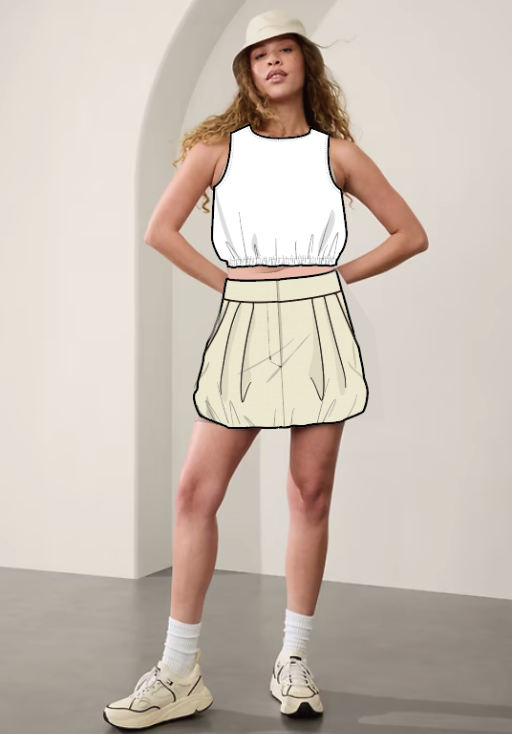
Click Browse (or drag and drop) to upload your sketch. In this example, we're using a sketch of a white cropped tank top paired with a beige bubble mini skirt, overlaid on a model reference photo.
The green checkmark confirms your image has been uploaded and processed successfully.
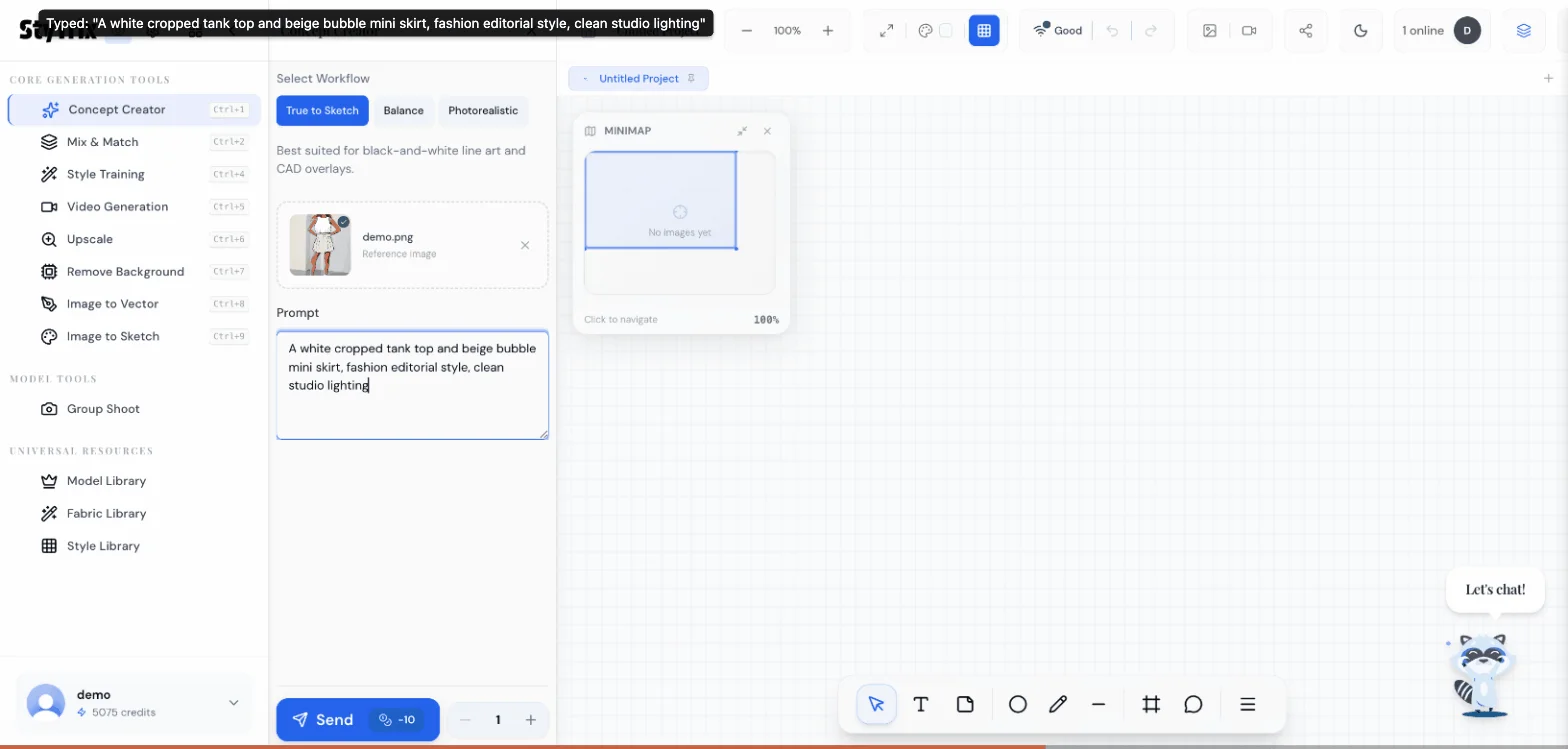
Step 4: Write Your Prompt
In the Prompt field, describe your design in natural language. Be specific about colors, materials, and style:
A white cropped tank top and beige bubble mini skirt, fashion editorial style, clean studio lighting
Tips for better prompts:
- Mention specific colors and materials
- Describe the style or mood (editorial, streetwear, casual, etc.)
- Include lighting preferences for more control over the output
- Keep it concise — the AI works best with clear, focused descriptions
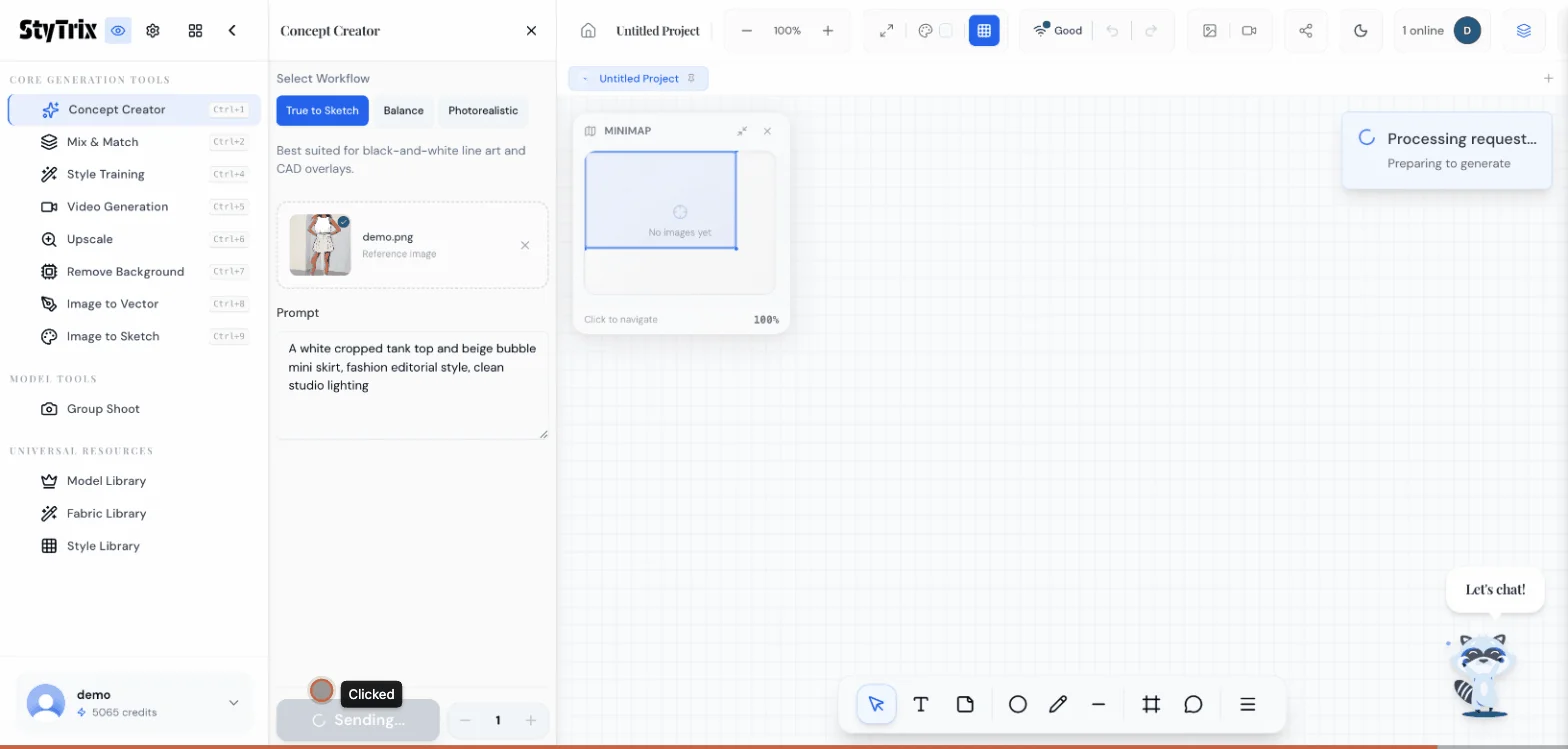
Step 5: Generate
Click the Send button (costs 10 credits per generation). The AI will process your sketch and prompt, generating a photorealistic image in approximately 20–30 seconds.
You'll see a progress indicator showing the estimated time remaining.
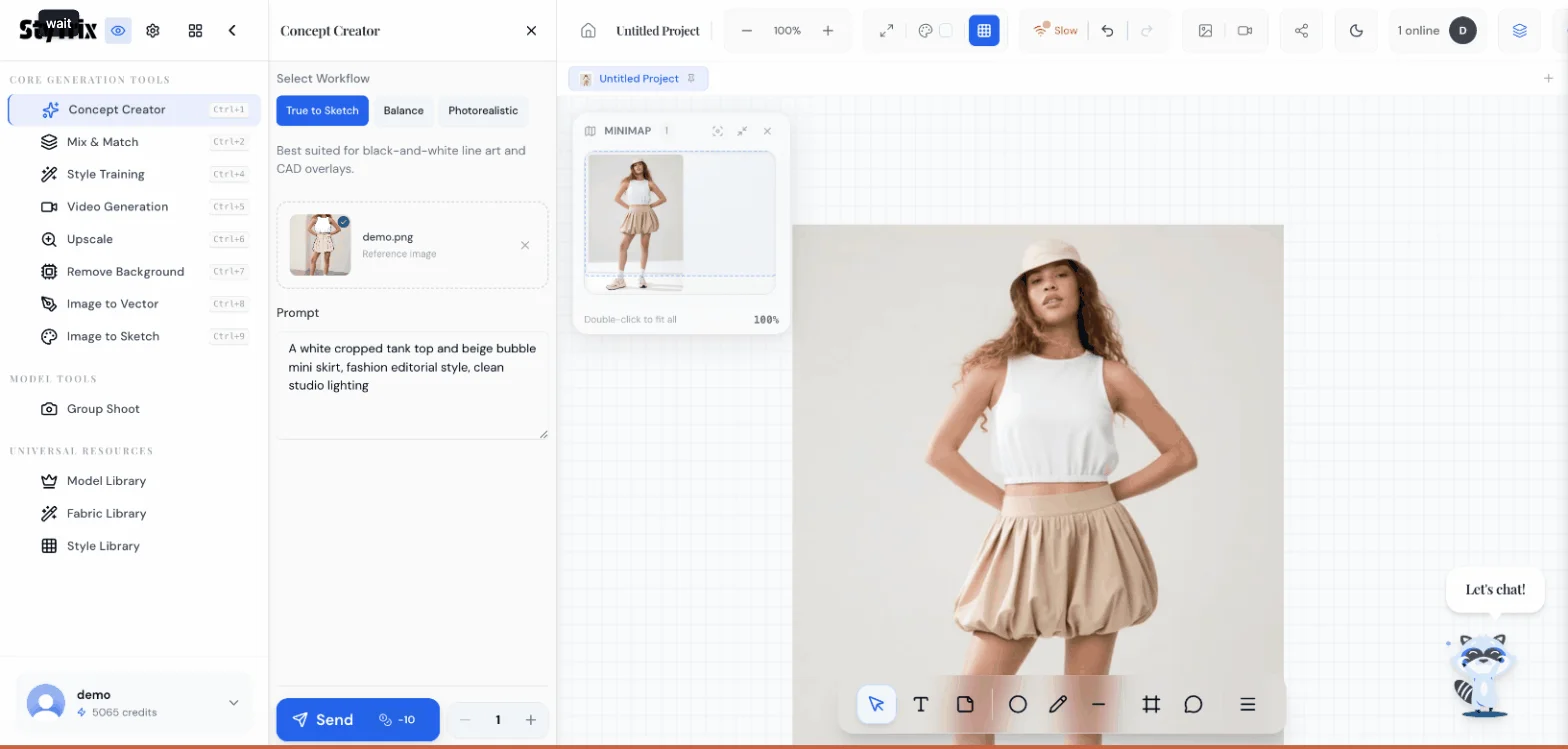
The Result
And here it is — your sketch has been transformed into a model-ready image. The AI has:
- Preserved the silhouette and proportions from your original sketch
- Applied realistic fabric textures (crisp white cotton, soft beige fabric)
- Generated natural model posing and studio lighting
- Created a clean, production-quality image ready for presentations, lookbooks, or e-commerce
Comparing Input vs. Output
| Sketch | AI Output | |
|---|---|---|
| Time | Hours of drawing | 30 seconds |
| Cost | Illustrator fees | 10 credits |
| Quality | Conceptual | Production-ready |
| Iterations | Redraw from scratch | Adjust prompt & regenerate |
What's Next?
Once you have your generated image, you can:
- Iterate — Adjust the prompt or try Balance / Photorealistic modes for different aesthetics
- Upscale — Use the Upscale tool for higher resolution output
- Remove Background — Clean up the image for e-commerce or lookbooks
- Video Generation — Turn your static image into a short fashion video
- Mix & Match — Combine different garment pieces from multiple sketches
Pro Tips
- Black-and-white sketches work best with True to Sketch mode — it interprets line art with highest fidelity
- Overlay sketches on model photos (like our example) to give the AI better context for posing and proportions
- Generate multiple variations by clicking Send again with the same inputs — each generation produces a unique interpretation
- Use batch generation (increase the count next to Send) to compare multiple outputs at once
Ready to try it yourself? Sign up for StyTrix and turn your sketches into model-ready images in seconds.
Related Tutorials & Guides
- Mix & Match: Combine Garments into Outfits — combine your generated designs into complete outfits
- Fabric Library: Generate Custom Fabric Swatches — visualize your designs in different fabrics
- Model Library: Create Custom AI Models — build models to showcase your sketched designs
- How to Create AI Fashion Designs: Beginner Guide — complete beginner's guide to AI fashion design
- AI Clothing Design App: Design Online — explore AI clothing design tools
Turn Your Fashion Ideas Into Reality
Generate stunning fashion designs with AI. No design skills required.
Start Creating

